 Going "green" is everywhere and has been in the forefront for a few years now. We've seen all the suggestions on how to conserve water, produce less trash, recycle, weed out plastic from our lives, etc. How can a motorist be "green" with respect to their vehicle? We've taken the guess work out of it and listed some suggestions below. These "earth-friendly" car habits are simple and can be performed by every motorist out there. It all comes down to timely maintenance and non-aggressive driving ;)
First off, slow down. Speeding and hard accelerations waste fuel. Use the cruise-control on highways to maintain a steady speed, thus saving fuel and lowering emissions. Lighten the load. Try to remove unnecessary items from the vehicle to reduce weight. Keep your tires properly inflated and aligned. Under-inflated tires waste fuel by forcing the engine to work harder to propel your vehicle down the road. Even more so, properly maintained tires last longer, saving you money and lessening landfill waste. Keep your engine running at its peak. A simple misfiring spark plug can decrease fuel efficiency as much as 25%. Never ignore your check engine light, it could indicate something going on with your emissions system, adding too the ever growing problem with emission pollution. Another way to lessen your contribution is to recycle used oil and antifreeze if you have some at home. You can call your local repair facility or government to find out where you can recycle fluids. Routine maintenance is key. This will make your vehicle last longer, get better gas mileage, emit less emission (with properly running engine), and keep its resale value for the future. If you're looking for a great auto repair facility in the San Diego area, give us a call The Dyno Shop, 619-562-3933. We are here to help with all your automotive repair needs.
1 Comment
 When we examine the topic of burning gasoline or diesel fuel, there are only a number of things that actually play a meaningful part in the reduction of gas mileage to point of being noticeable. There are a number of reasons to blame for your gas mileage not being what it used to - the gasoline you are using might be different and contain more ethanol, the conditions in your engine or fuel system may have changed causing your vehicle to be less efficient in converting the fuel energy, or you might be driving differently maybe a bit more aggressive or more city instead of highway driving. The biggest culprit that has been discovered over the last century of driving is carbon deposits in older vehicles.
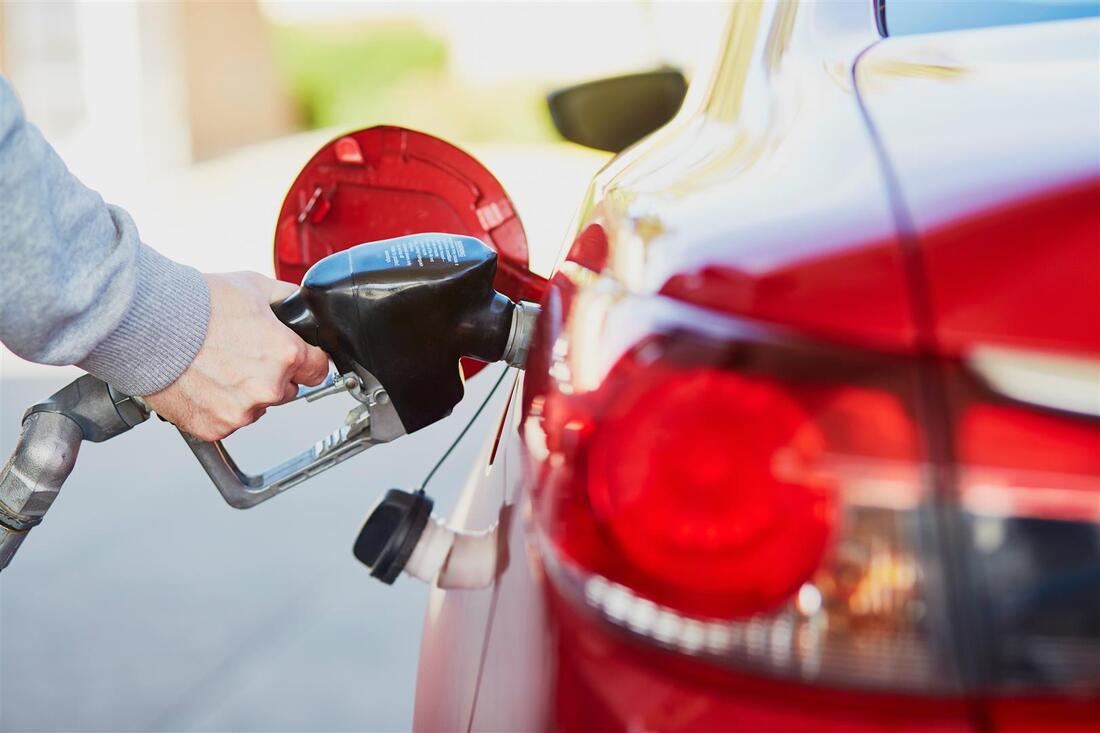
Your vehicle can develop deposits in the fuel system leading up to the engine, in the fuel injectors themselves, or on other critical components such as the oxygen sensor or the EGR valve. It is the fuel filters job to filter these deposits out before the fuel reaches combustion, if not this will effect the mileage and emissions. Fuel Injector deposits effect mileage by impairing the injector to spray an efficient nice fine mist that can burn at the optimal rate. The deposit in the injector causes the spray to be more like a dribble in both gasoline and diesel engines, affecting the air/fuel mixture and how much actually gets used during combustion. In all of the scenarios your engine is not running at it's best. These deposits form usually from gasoline or diesel that hasn't been fully burned. The incomplete by-products settle and typically morph over time into carbon molecules that have been cooked. The best way to prevent deposits of any kind is with additives that deal with the deposits as they form or remove pre-existing ones. Gasoline and diesel have detergent requirements; diesel doesn't have one, which is why additives are in high demand; gasoline's detergent level is mandated by the Government. But research has shown that the lowest acceptable quantity detergency often isn't enough. So now you're asking yourself, how can The Dyno Shop help? Let me tell ya. First we can check all or most of these components for deposits. We offer a top engine clean, injector flow testing and clean/rebuild, as well as suggestions for which additive would be best. Along with these services, we would suggest having the tire pressure checked, replacement of the air and fuel filters, spark plugs gap checked and possible replacement, cap and rotor replaced (on carburetor vehicles), Oxygen Sensor examined and to check to make sure you have a good flowing muffler. For more information or if you have any question, give us a call 619-562-3933!! It's finally summer time here in San Diego...warm, longer days; fun at the beach; vacations; and high gas prices! Yep, I said it and you know it happens. We want to help you any way we can to save money at the pump. Here are 10 quick driving tips to save you money this summer (and all year really):
1. Avoid quick acceleration 2. Drive the speed limit 3. Use your cruise control on the highway 4. Use your overdrive gears whenever possible 5. Accelerate steadily before approaching hills 6. Keep your windows rolled up on the highway 7. Turn off your vehicle if you'll be standing still for more than a few minutes 8. Remove excess weight from your trunk 9. Plan in advance for quickest routes and less traffic 10. Leave plenty of time to reach your destination We don't want to leave anything out though. So here are some tips for the condition of your vehicle to help you save money: 1. Check tire pressure and adjust as needed 2. Be up to date with oil changes and scheduled maintenance 3. Check gas cap condition 4. Be up to date on engine tune-up As always, we are here for you and your vehicles! Give us a call anytime with questions or to schedule your appointment 619-562-3933 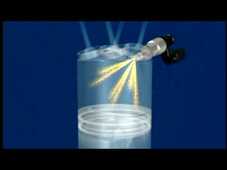 The evolution of fuel delivery for automobile engines has been an exciting one to follow. From the compression-less engine using gun powder to drive water pumps to the internal combustion fuel driven engines we know of today. When you sit in the driver seat and push a button or turn the ignition key, a signal is sent to the internal components of your engine through wires and the PCU. For your vehicle to run it must fuel, air, and combustion. The fuel injectors do as they say, they inject the chamber with fuel, it mixes with air and the piston is driven up with force to create combustion and bam, fire in the hole! There are a lot more components to this, but for the purpose of this blog we'll leave it at that. There are many reasons to have a vehicles fuel injectors cleaned. The main circumstances include fuel contamination, having uneven cylinder fueling/spark plug wear, an unexplained cylinder misfire where you have spark, general maintenance 80k-100k miles, and for peace of mind at time of engine rebuild. Fuel injector cleaning methods and results vary dramatically whether you choose to perform an on-car cleaning method, or an off-car fuel injector service. First, let’s cover on-car cleaning methods, of which there are two. One method simply uses a pour-in additive to the fuel tank. The concentrated cleaner is mixed with fuel in the tank where it slowly makes its way through the fuel system, eventually passing through to the injectors. The other on-car method uses a pressurized canister of injector cleaner. The canister is connected directly to the fuel rail. During this process, the fuel pump is disabled and the engine actually runs off of the cleaner, not the fuel in the tank. The chemical passes through the injectors, cleaning them in the process. The engine usually operates for about 5-10 minutes on the cleaner. This process is more time consuming than the pour-in method and requires special equipment and training. There are many disadvantages to using the on-car cleaning method. The chemicals used are not very aggressive. The chemicals used have to be similar in nature to gasoline since the engine must run on the chemical alone. Because the cleaning is done on-the-car, the cleaner must not damage any of the other components on the vehicle that are sensitive to chemical contamination such as the oxygen sensor, catalytic converter, and others. Therefore, the cleaner used is a fairly mild detergent. Also, the technician really never knows what results the on-car cleaning accomplished. Without being able to perform spray pattern tests, flow-rate test, and leak-down tests, the technician “hopes” the on-car method will increase vehicle performance. For preventative maintenance, on-car cleaning usually won’t hurt. However, if an injector is restricted to the point that it is causing a driveability problem, don’t expect on-car cleaning to help. At this point, you’re most likely wasting time and money. Off-car cleaning is a completely different process than either method used for on-car cleaning. Once the injectors are removed from the vehicle they are cleaned ultrasonically. The injectors are cleaned internally and externally while being pulsed at varying pulse widths and frequencies (RPM). The ultrasonic waves create cavitation bubbles in the cleaning fluid. When the microscopic bubbles touch a surface, they implode, creating forces in excess of 10,000 psi. These implosions, combined with the correct cleaning chemistry and the all important “back-flush” are what guarantee a thoroughly cleaned fuel injector. Once the injectors are cleaned, their operation is verified using the injector flow bench. The flow bench can be used to examine the injector’s spray pattern, dynamic and static flow rate and to perform a leak test, none of which can be performed with the “on-car” method. Once the injectors are cleaned and fully tested, critical components are replaced to complete the service. This includes any o-rings, seals, filters and pintle caps. When we are done the injectors are as good as or better than rebuilt injectors that can be purchased at any auto parts store. The best part is that we can help!!! Our technicians are trained experts with our flow machine. Give us a call today! 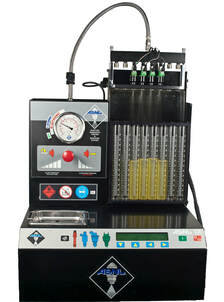 When something goes wrong with your car or a feature is activated, a signal runs through the electrical system to the vehicles control module and then to the associated symbol that illuminates on your dashboard. These symbols have a wide range of meanings, some dangerous to your vehicle and some just an indicator. Your dashboard may be different and the symbols might be slightly altered from I am showing you below. So if you are not completely sure, consult your owners manual. Some of these lights should not be ignored and are warning you of something very serious going on with your vehicle. 1. Check Engine Light 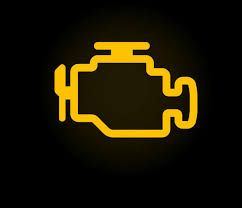 What it looks like: A yellow submarine, sometimes telling you that it is the Check Engine light What it indicates: It can either blink or stay solid. In both instances, it means that something is going on with your engine and you should have a mechanic use a scanning device to read the codes that are being stored in the computer. 2. Engine Temperature Light  What it looks like: A tiny pirate ship sailing on the ocean What it means: Your engine is too hot...pull over and turn it off! Do not open your hood right away. 3. Oil Pressure Warning 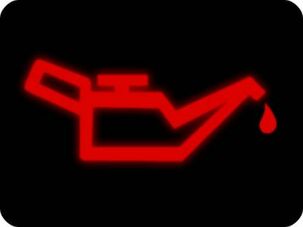 What it looks like: If you were to rub it a genie would pop out and grant you 3 wishes. What it indicates: Your vehicle is running low on oil or there is something wrong with your vehicle's oil pressure system 4. Fuel Indicator 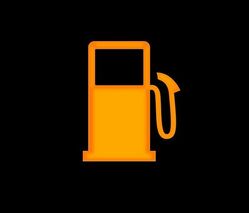 What it looks like: A wonky slot machine What it means: You are low on fuel and need to get to the nearest gas station asap! 5. Seat belt Indicator  What it looks like: An arm-less man with a seat belt on What it indicates: Buckle up please. If you don't, not only will this blink at you, you will have to deal with a very annoying dinging noise that just won't stop. 6. ABS Light  What it looks like: A fitness weight ball promoting ABS baby. What it means: Something is wrong with your anti-lock braking system, which should be diagnosed and fixed. 7. Tire Pressure Warning Light 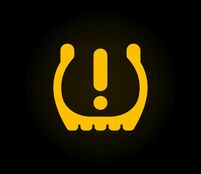 What it looks like: A man with a tall hat showing you "goal!" What it indicates: One (or many) of your tires are too low on pressure and need to be attended to. 8. Airbag Indicator  What it looks like: A very pregnant woman relaxing What it means: There may be an issue with your airbag system or with one of the airbags in the vehicle. 9. Battery/Alternator Warning Light 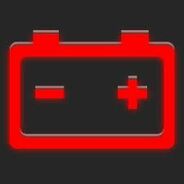 What it looks like: A cheeky lego head; wink, wink. What it indicates: Something is wrong with the battery charging system. This could be anything from a broken alternator belt to complete alternator failure. The vehicle is running strictly on battery power. 10. Glow Plug Light  What it looks like: A fun, nauseating roller coaster What it means: You are currently in a diesel vehicle. When first getting into the vehicle and you turn the key to the on position this light will pop up and stay solid. This means that the vehicle is letting the glow plugs warm up. Do not start the diesel engine until this light turns off. If you have been driving for a while and this lights pops up, you could have a problem with the glow plugs or the system. I could go for another 4 pages, but I will stop here. These are the most common lights that you will see, most meaning that something is wrong. Found this lovely picture chart below on google that will give you some insight as to what the 40+ other hieroglyphics mean. If any of the above pop up and you don't know what to do give us a call!!! 619-562-3933 We are here for you! 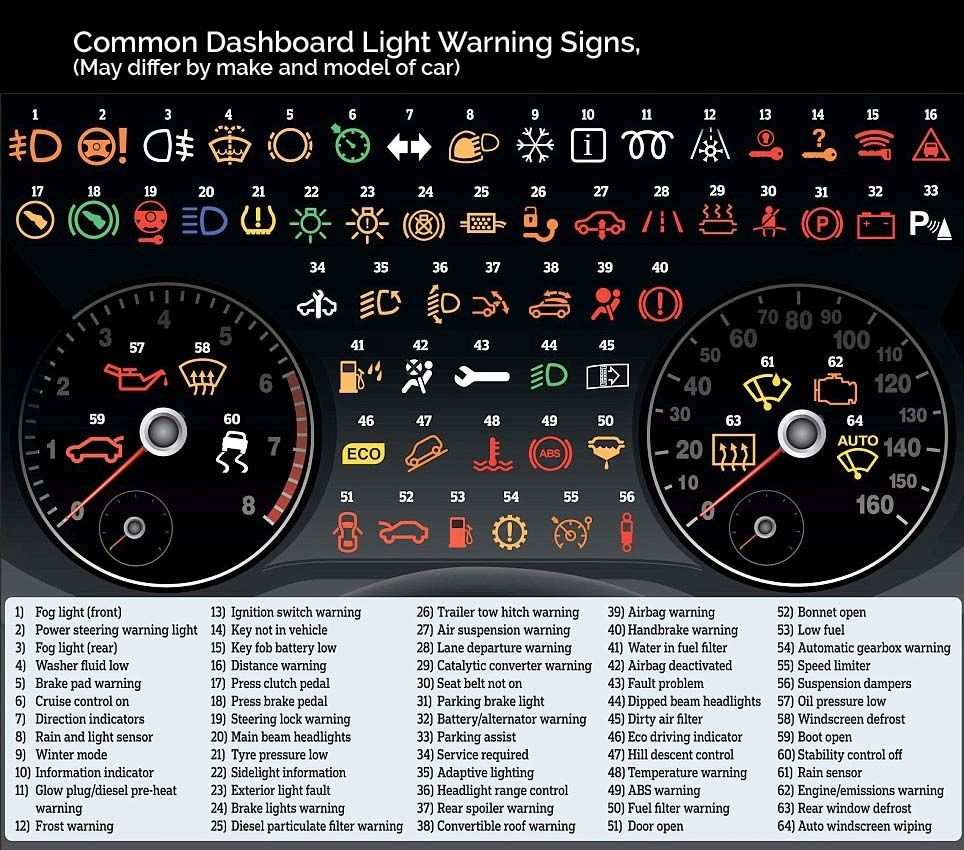 If you are one of the lucky few who own a vehicle that tracks your mileage between oil changes, then this post isn't for you. For everyone else, read on to get the know how. It's simple really...pop the hood, find the oil dipstick handle and voila you look at the marks to tell if your oil needs to be changed. Which mark is the low mark? What color should the oil be? Where is the dipstick handle? Let me break it down for you. Before you start, grab a cloth that you don't mind getting oil on. After you pop the hood and prop it up, you will see a (usually) yellow handle. This is your oil dipstick. 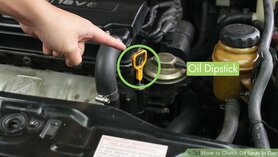 Next you will grab the handle and pull the dipstick out of its tube. Wipe it with a cloth, stick it back in all the way, then pull it out again. Examine where the oil is at on the stick (see image below). They won't all have the L and F to indicate Low and Full, but the lines will be on all sticks. Some will have a solid, etched block indicating the between level. 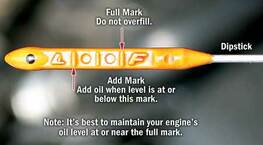 And that's it. Simple, yet something YOU can perform to ease your mind. If you find that the level stays in the Low area after adding oil or having your oil changed, then you might have an oil leak which should be diagnosed. We are always here to help with any of your automotive repair needs!
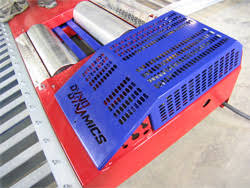 A dynamometer, dyno for short, is a piece of equipment used to measure force, torque, or power. As a tuner we use the dyno to help diagnose automotive problems that our clients are having while driving. The dyno allows us to "drive" the vehicle in a controlled environment, off the road ;) so that we can focus our attention on the laptop that is connected to the vehicles PCM. Along with being able to identify drive-ability issues that one might be experiencing, the dyno also allows us to performs an unparalleled tune-up on a carbureted vehicle. When you modify a vehicle, you change the dynamics of the internal components and how they work together. The dyno allows for the tuner to make sure there is the correct air to fuel ratio to support the rpm and load on the engine with any upgrades or modifications.
These large drums allow the tuner to simulate different driving conditions, ranging in speed, load, miles driven, or getting the engine to a certain temperature. And we do all this without touching any asphalt! If you have installed any upgrades or modifications to your vehicle, a dyno tune is gonna be the best money you could spend. This ensures that your vehicle is operating with safe air to fuel ratio to prevent any hiccups down the road that could lead to internal engine damage. The dyno tune should be performed at the end of all the upgrades for the most bang for the buck. Give us a call if you would like to schedule your appointment on our dynamometer. Ever walked out to your vehicle and noticed a puddle on the driveway underneath it? Was it reddish, brown, green, clear? After having a great morning getting ready for work, finding something like this could really put a kink in your day. Knowing what you are looking at could put your mind at ease in regards to whether it is an emergency or something that can wait until you make it to our auto repair shop. Today I want to share with you how you can try to determine what is leaking based on the color and possibly the location. If the fluid is reddish in color and towards the front of the car, this is most likely power steering fluid. It will be thin in texture. Motor oil will appear as a thin light brown liquid to a thick dark black one depending on its age. You will find the leak in various locations of the automobile. Anything ranging from light yellow to a dark brown could be your brake fluid. Brake fluid starts off clear to a light yellow and darkens as it ages. To be able to tell the difference between motor oil that is brown and brake fluid that is brown is in the texture. Brake fluid will be very slick. If you find the liquid around the center of your car and it is orange in color it is most likely transmission fluid. Bright yellow, green, or purple indicates a coolant leak. With coolant leaks, the vehicles age usually plays a big part. Older vehicles sometimes blow off a little bit of coolant when the engine gets hot. But newer vehicles recycle this blow off, so there shouldn't be any coolant externally. Lastly, if you see clear fluid dripping it is most likely just water. You will see this most often after you have been running the air conditioner because of excess condensation that builds up. If you happen to spy a leak coming from your vehicle, please do not hesitate to bring your vehicle in to the shop. In most cases your vehicle will still be able to operate enough to get you down the road and to the shop, but we do not recommend sitting on it. Leaks are a warning your vehicle is giving you that something is going wrong. If you catch a small leak early then most often than not the fix is simple and less expensive then if you were to wait it out as the leak gets worse. We are always here for you, give us a call anytime for further questions or concerns 619-562-3933 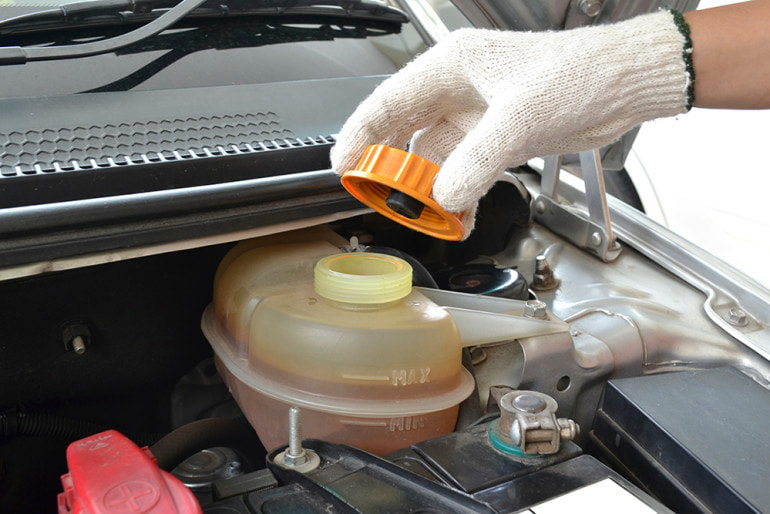 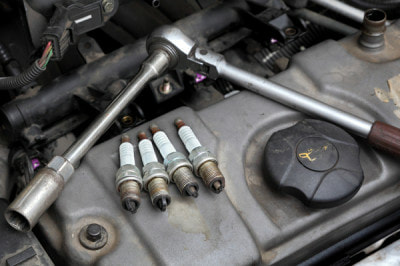 Is your vehicle in need of a Tune-up??? There are many symptoms that an out-of-tune vehicle will have. The first and most obvious will be gas mileage. If your average over 3 or more fill-ups has gone down 15% you are likely in need of a tune-up. Some other problems that may occur frequently are: fast idle when warm, stalling, low power, rough idle, knocking or pinging, hard starting, misfiring, hesitation, black exhaust, engine runs on when key is off (dieseling). If your vehicle is doing any of the above, you could be losing efficiency and performance!
Even if your vehicle does not exhibit any of the above listed problems we recommend a tune-up every 24 months or 24,000 miles. It is a good investment in preventative maintenance which pays off with having a reliable, smooth running vehicle. Not sure if your vehicle is in need of a tune-up? We are here to answer any of your questions, give us a call at 619-562-3933 anytime Monday-Friday 7am to 5pm, the 1st & 3rd Saturday from 8am-5pm.  With the holiday season upon us, most of us are in full swing present purchasing mode. Our checklists have been made for the items we would like to get our loved ones; holiday party potluck checklists made; maybe even New Years resolution checklist in the works too. With all of the holiday festivities we sometimes forget the most important checklist, especially if one is planning on a holiday road trip to visit family and friends; our vehicle maintenance checklist. I say that this is more important than your present checklist because it would be a really big bummer if you broke down on your way to spend time with those loved ones. Below you will find a simple checklist that you can go through to be proactive before your holiday vacation.
1. Check condition and level of ALL fluids. This includes oil, transmission, brake/clutch, and windshield washer fluids. If any are low or seem dirty it could be time for a fluid exchange. 2. Notice if your vehicle has any links. This may not be fixable in your driveway, but if found early most leaks will be inexpensive to fix. 3. Inspect tire condition. You can use the penny test to check the tread depth (with Lincoln's head down, the tread should cover up to his neck). Visually inspect the rubber condition, looking for tears or uneven wear (if you see cords get to the tire shop ASAP) 4. Replace the wiper blades. The months of sunny days here in San Diego dries out the rubber of our wiper blades. Just like me, you probably haven't used your blades since May and they are torn up. As always, we are here to help! We offer a 55-pt inspection that will cover the above and more combined with a lube, oil and filter change for only $127 labor cost*! Give us a call today to schedule an appointment 619-562-3933 *parts and hazmat extra. some vehicles will be extra labor |
Categories
All
Archives
January 2020
|

|
(619) 562-3933 |
 RSS Feed

The Dyno Shop
10042 Prospect Ave, Santee, CA 92071
(619) 562-3933
Business hours:
Monday through Friday, 8:00 am - 5:00pm*
Closed on Holidays
EZ Auto Registration hours:
Monday through Friday, 8:00 am – 5:00 pm*
Closed on Holidays
*Closed from 11:30 am to 12:30 pm daily - but we will be answering the phone :)
Thank you for your continued patronage!

Powered by Benchmark Email

© 2017 The Dyno Shop